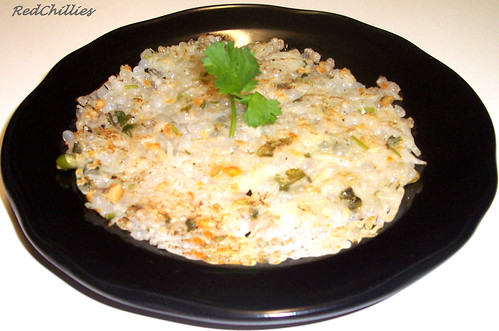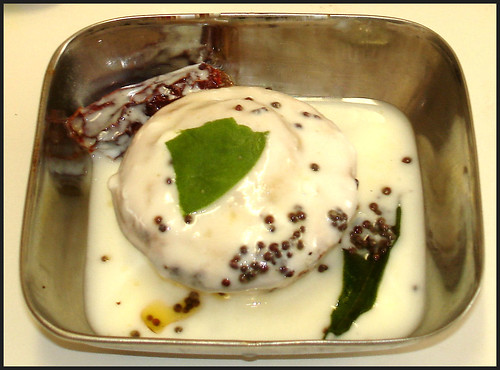

Methi Paratha served with Dahi and Lima Beans Subzi (as side dish)
A paratha(also spelled as parantha) is an Indian flaky, flat-bread made up of whole wheat flour. Dough is first prepared, rolled out and then cooked over a flat pan/tava.; ghee or oil is added during the cooking process. Sometimes veggeis, greens like fenugreek, spinach are added to the dough making the parathas healthy and delicious. For this recipe of Methi Paratha, methi/fenugreek is added while making the dough and then the parathas are made the usual way. Spinach paratha can be made similar way.My mom makes varieties of parathas for breakfast and she is an expert in making Aloo parathas and Methi parathas. (Don’t we all think the same way about our moms :-) ). I remember growing up my mom used to pack these for my lunch and my friends would finish them up in no time. They would even request me to bring more of them the next time around.
Fast forward few years (OK, 10 years to be precise) and I make these at home myself; of course nowhere near to what my mom makes. We get very good Methi/Fenugreek leaves during the fall, winter season here and so I make them whenever I can. The frozen methi variety does not have the same flavor, zest and aroma as the fresh ones and so do not yield good results.
( Methi Paratha served with Dahi and Lima Beans Subzi (as side dish))

- Chop the leaves first, add salt, chilli powder and set aside; after a while it leavens water and that can be used for making dough.
- Do not use too much water while making the dough, the chopped methi leaves will leave water and will make the dough more watery and we do not want that.
- Knead the dough well, use as much elbow grease and make it as soft as possible.
- 3 cups whole wheat flour( I used the atta from Indian store)
- 1.5 cups of packed methi/fenugreek leaves (remove the stems)
- 1 tsp grated ginger
- Carom seeds/Ajwain
- Turmeric
- Chilli powder (depending on spice level)
- 2 tsp oil
- Salt
- Water for kneading

( Methi Paratha served with Dahi and Lima Beans Subzi (as side dish))
Method:- Dough:
- Make sure the leaves are thoroughly cleaned and the stems are removed. Chop the fenugreek leaves finely. Add salt, chilli powder, turmeric, ginger, carom seeds to this and mix well.
- Let this sit for about 30 minutes. The combination of chopped leaves and salt releases some of the water.
- Now add the flour in small bits and mix with hands, because of the presence of methi water, you will be able to knead a bit. Doing this will also spread the fenugreek mixture through out. After all the flour is added, add oil to it and mix well.
- Add water in intervals and knead thoroughly to make soft dough. Do not add too much water.
- Keep aside covered for 2 hours or refrigerate. Note: the parathas come out best if the dough is refrigerated overnight.
- Heat a flat pan/tava on medium to high flame.
- From the prepared dough, take out lemon sized balls and shape into balls.
- Roll them into rounds with a rolling pin dusting little flour in between, to prevent it from sticking.
- Add a 2 drops of oil on the rolled circle, spread it around and fold it into a triangle. Roll the triangle into flour again and then using the rolling pin, roll into kind of a circle.
- Place this on the pan and after about 30 secs, the circle/paratha begins to cook on the bottom and begins to puff at different places.
- Turn it over and let the other side cook. Spread around little oil and cook. Keep a close eye on the pan, else the parathas will brown and harden.
- Take out from the pan and place them in box and cover it with a lid.
- Follow the steps for the remaining dough and make the parathas.
- Serve with any subji, pickle of choice and or with some spiced yogurt/ Dahi.